This article will explain you how to perform a BIOS (Basic Input or Output System) upgrade. The complete procedure is given below.
The boot is the initial set of booting operations executed by Basic Input or Output System- BIOS when the computer system is loaded with. This software identifies and integrates the hardware system from the CPU to the mouse. It is stored in the ROM, EEPROM or other Flash Memory chips on the motherboard and works with each exacting model of the PC.
Modern workstations have stored the BIOS software in a rewritable memory and so, it can be upgraded or rewritten as per requirement.
Via the BIOS User Interface, a user can organize hardware, enable and disable system modules, set the system clock and allow password setting to prevent unauthorized access by external users or malicious software.
Procedure to Upgrade your BIOS Software
The BIOS software is rewritten or re-flashed and upgraded to enable fixing bugs, replacing a damaged BIOS or improving performance by supporting new hardware.
Step 1 – Spotting the current BIOS version
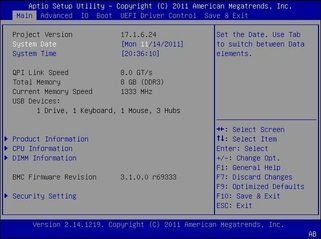
1. Identify the information about the system application in Windows and enter the following for the different versions:
- msinfo32 in the Search box for the versions-Windows 7 or Vista.
- msinfo32 in the Windows XP’s Run box.
2. Click on the System Summary option.
3. On the right side, the BIOS version information is displayed, below the processor speed details.
4. Note down the version number and the date.
Step 2 – Retrieving model of PC from Company Website
1. View the web page of your PC manufacturer to check BIOS updates in the Support page to download specifications that are compatible only with your computer model.
2. Copy the upgrade details and the document that is available with it. Ensure that you read the checklists, instructions, fixes, new functionalities and warning written in the Read Me page.
Note: Customers who have assembled their PC can look for the motherboard model number on the internet. Get the model number after downloading and running CPU – Z and clicking on the tab of Mainboard tab.
Step 3 – Updating your BIOS Software
Updating BIOS in a modern PC is simpler than in older versions:
1. .exe program file should be downloaded from the manufacturer’s website.
2. Run the .exe Program after quitting all the open programs. Then reboot.
Note: Make sure that there is no interruption during BIOS update, as this will result in `no boot up.’
Updating an older PC:
1. Manually set up the bootable disk for updating BIOS.
2. For configuring the blank CD/DVD, USB thumb drive or floppy disk download software.
3. Boot off the configured drives for updating the BIOS software.
Note for alternate set ups:
• An ISO file can be used with your choice of disk burning application. If such a program is not available then try the ISO Recorder to create a BIOS update CD for Windows XP/7/Vista versions.
• You can copy some files to the bootable disk by using other systems. Then, open the BIOS software when starting. With the changed boot, order the computer system searches for a bootable CD or USB drive. After locating the desired drive or disk, the computer loads the Operating System from the hard drive.
- Your BIOS is now upgraded.
Is it truly necessary to Upgrade BIOS
Consult the system manufacturer’s website if any BIOS revision is required or not. Only for specific reasons such as new hardware support or bug fixing, it is unnecessary to upgrade the BIOS software. If there is any interruption while upgrading, like a power cut or inoperative battery in case of a laptop, then it might cause permanent damage to the motherboard.
