Imagine trying to open your browser only to see a message saying that the current site you’re trying to assess cannot be reached followed by a “dns_probe_finished_nxdomain” error. It’s a situation that can even turn the timidest of us into a path of fury and rage. There’s a vast multitude of things that could have potentially gone wrong, but one of the most common ones is faulty DNS servers.
So, what exactly is “dns_probe_finished_nxdomain”, and why are you seeing it? Are there some quick fixes to resolve the issue?
Table of Contents
Firstly, what is DNS?
DNS or Domain Name Server is akin to a phonebook. It lets users connect to the right website using specific domains rather than IP addresses. The basic purpose of a DNS is to translate the name of the host (www.randomdomain.com, for instance) into a lot more advanced IP address (198.3.128.12) that your computer can easily process. When you type in a query into the search bar, DNS gets to work and goes through its extensive collection of nameservers to determine the right fit.
The process of DNS looking for the appropriate file among the thousands in the nameserver is a laborious process, but in real-time only takes a couple of seconds at best.
So, when you type in something in the search bar of your browser, it makes its way through the Internet only to reach another DNS recursive resolver. This information travels to the DNS root nameserver and then to the Top Level Domain (i.e .in or .org).
Now, the TLD server shoots back a response in the form of the IP address of the domain’s nameserver. Finally, the recursive resolver comes into play, and the IP address that was initially requested before starts to appear.
So, what is the dns_probe_finished_nxdomain error?
Reiterating that the process of resolution and DNS lookup is a highly complex process with a large number of moving parts. So, a lapse in any of these parts can result in an error that manifests as dns_probe_finished_nxdomain. In fact, the nxdomain in “dns_probe_finished_nxdomain” stands for a non-existent domain.
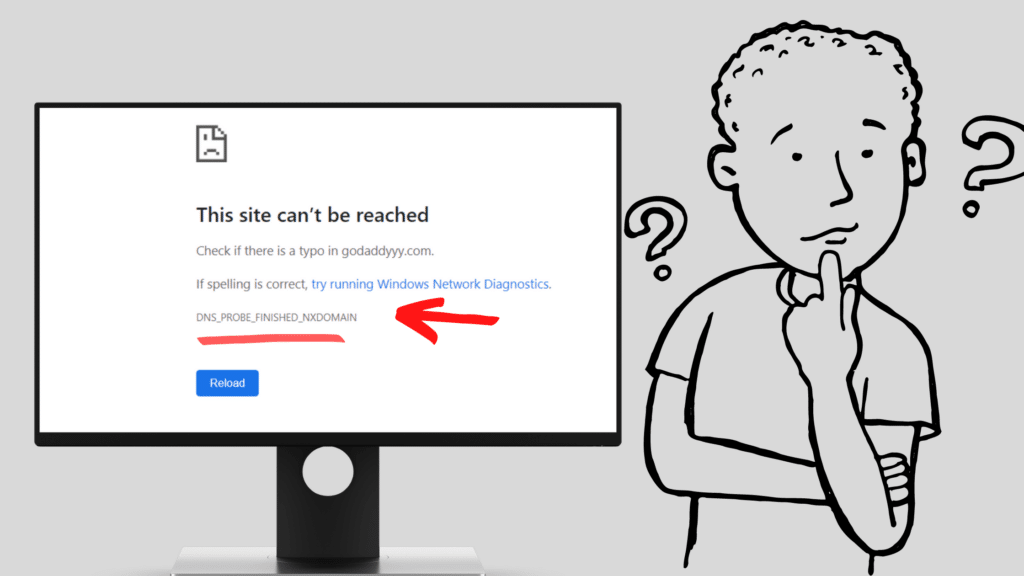
You can see a warming message in different ways depending on the browser you often use. In the case of Google Chrome, the error shows up as “dns_probe_finished_nxdomain”, along with a message saying that the server IP address could not be found or this site can’t be reached.
If you’re a Mozilla Firefox user, then you might be seeing something along the lines of ‘Hmm, we’re having trouble finding that site’. Microsoft Edge more or less follows the same pattern with a notification indicating Hmmm…can’t reach the page. Safari, the default browsing app on all Apple devices, simply displays Safari can’t find the server.
Before we go on to the actual fixes of the “dns_probe_finished_nxdomain” problem, it’s pertinent to identify where the issue lies. An easy way to do this is by checking if you’re seeing the “dns_probe_finished_nxdomain” error only on a single website or across multiple web pages.
In case the error is localized to a single site, then it could be an error on their side, and you have nothing to worry about. Just wait for some time and try accessing the website again. But, on the other hand, if you’re seeing the “dns_probe_finished_nxdomain” message across different pages, then it’s time to intervene and test out the methods listed below.
How to fix the “dns_probe_finished_nxdomain” error?
While there are multiple ways to resolve the issue under consideration, here’s a list of methods that most IT professionals would stand by to fix the “dns_probe_finished_nxdomain error”. We’ll discuss each one of them in the further sections.
- Releasing and renewing IP addresses
- Restarting DNS Client Servies
- Changing to a different DNS server
- Resetting Chrome Flags
- Shutting down VPN’s and other antiviruses temporarily
- Checking your Local Hosts files again
- Restarting your computer/ laptop
1) Releasing and renewing IP addresses
In “Dns_probe_finished_nxdomain” error there isn’t exactly an error from your side, so it does make sense to take a second look at the IP address on your device. Releasing and renewing your IP address isn’t as complicated as it sounds. Follow these series of steps to successfully accomplish the task.
On devices running on Windows OS
- Step 1: Navigate to the Command Prompt by pressing on the Windows and R key simultaneously. Once you’ve found the Command Prompt tool, type in “cmd” on press Enter.
- Step 2: Now, enter in ipconfig /release and press Enter. This should ideally release your existing present IP address.
- Step 3: Next up, type ipconfig /flushdns and tap on Enter. This ensures flushing your DNS cache. You should now be able to see a message “Successfully flushed the DNS resolver cache”, in case the process was successful.
- Step 4: After this, you’ll need to type in ipconfig /renew and press Enter. This renews your IP address.
- Step 5: If you want to reset your IP settings, then type in the following commands netsh int set dns and netsh winsock reset.
In case Step 5 seems hard to follow, you can always manually disable your network connections and re-enable them again. To perform this, go to Control Panel on your Windows computer from the Start menu. Now, click on Network and Internet Settings and navigate all the way down to Network and Sharing Center.
You’ll see an option called Change Adapter Settings in the left-hand column, click on it. This should open up a new portal with a whole list of active network connections. Click on Local Area Connection or Wireless Connections and choose to Disable. You can reactivate them later in the same manner.
For Macs
- Step 1: Find System Preferences by clicking on the Apple logo at the top right corner of your laptop/ computer.
- Step 2: Now, click on the Network icon and go to Advanced Settings.
- Step 3: Navigate to the TCP/IP tab and choose to “renew DHCP lease button”. This ensures that your IP addresses’ renewel.
- Step 4: You can also flush your DNS cache by going to the Utilities tab and clicking on Terminal.
- Step 5: Type in the command dscacheutil -flushcache and press Enter. Unlike in a Windows device, you might not get the confirmatory message in case the DNS cache has been emptied successfully.
2) Restarting DNS Client Service
This method is exclusively for Windows devices. You can try restarting the DNS client services, which supposedly clears up redundant caches and obsolete DNS domain names. Follow the steps to successfully restart your DNS client services.
- Step 1: Open Command Prompt by pressing the Windows key and R key simultaneously.
- Step 2: Once Command Prompt opens, enter in “services.msc” and press Enter.
- Step 3: Go down to the bottom where you’ll see “DNS Client”. Right-click on it and choose “Restart”.
If the Restart button is greyed out and you’re unable to click on it, then consider this alternate method.
Step 1: Go to Command Center by pressing on the Windows key and the R key simultaneously.
Step 2: Now, enter in “cmd” and press Enter.
Step 3: Enter in these series of commands: net stop dnscache ; net start dnscache
You could run into an error in some versions of the Windows OS. You might be seeing a message saying “The requested pause, continue, or stop is not valid for this service”. This is an indication of the fact that you’re better off picking an alternative method altogether.
3) Changing DNS servers
You can always try changing your existing DNS servers from the default ones to public DNS servers like Google or Cloudflare. DNS servers typically make use of the IP addresses assigned by the ISP, so switching to a public server could effectively correct the persisting “dns_probe_finished_nxdomain” error.
If Google servers are your pick, then the 8.8.8.8 and 8.8.4.4 are easily your best bet. Word in the community is: they’re more dependable in the longer run. But, Cloudfare’s newest offering, the 1.1.1.1 is a worthy alternative as well. It’s popular to achieve faster speeds consistently.
But, on the off chance that you’re already using a free server and still seem to be encountering the same issues, going back to your default server can correct the issue. Google and Cloudfare, despite their claims, can run into roadblocks sometimes.
Here’s how you change your existing DNS addresses:
On Windows devices
- Step 1: Open the Command Prompt by pressing on the Windows key and R key simultaneously.
- Step 2: Type in Control Panel and press Enter.
- Step 3: Now, go to Network and Internet Settings and click on Network and Sharing Center.
- Step 4: You should be able to see an option to Change Adapter Settings, click on it, and find your currently active network connection.
- Step 5: Pick either the Local Area Connection or Wireless Network and go to Properties.
- Step 6: Select Internet Protocol Version 4 or 6 depending on your preference and click on “Use the following DNS server addresses”.
- Step 7: Change the addresses to the following: 1.1.1.1 and 1.0.0.1 (for IPv4), 2606:4700::1111 and 2606:4700::4700:1001 (for IPv6).
- Step 8: Press on OK once you’re done and restart your browser to complete the process.
For Macs
- Step 1: Navigate to System Preferences from the drop-down menu that appears when you click on the Apple logo at the left-hand upper corner of the screen.
- Step 2: Click on the Network icon and then on Advanced.
- Step 3: Now, find the DNS tab and click on it.
- Step 4: You’ll now need to enter in the new server addresses powered by either Google or Cloudflare. For Cloudflare servers, use the following DNS server addresses as mentioned above in the previous section.
4) Resetting Chrome Flags
If your default browser is Chrome, then pay close attention to this method. In some exceptional cases, the settings on your Chrome account may experience altering accidentally, consequently going a little haywire. To go back to the default settings, type in chrome://flags into the browser. In the portal that opens, pick on Reset all to default. Remember to restart Chrome once you’re done resetting the Flags or other similar experimental features.
You can also try cleaning the browser. This method stays the same across all devices. Follow the steps given below to clean Google Chrome.
- Step 1: Open the Google Chrome application on your phone or computer and navigate to the Menu.
- Step 2: Click on Settings and scroll down to Privacy and Security Settings.
- Step 3: Pick the option that says Clear Browsing Data.
- Step 4: Click on All time where it mentions Time Range and choose to delete Browsing History, Cookies, and Cached files including Images.
5) Shutting down VPNs and other antiviruses temporarily
Most users end up overlooking VPNs and antivirus software when it comes to a “dns_probe_finished_nxdomain error”. But, these third-party applications can sometimes come into conflict and modify the all-important Network Settings. So, it might be worthwhile to disable the VPNs and all the antivirus software installed on your computer.
To shut down VPN, type in Network Connections in the search bar and click on View Network Connections. You’ll be seeing a VPN icon, so click on that and choose to Disable.
6) Checking your Local Hosts files again
The Local Hosts file on your computer houses all the manual DNS entries, which are linked to unique IP addresses. This treasure trove of data may sometimes get altered or, in worse cases, get corrupted.
So, it might be worthwhile to cross-check if the domain of your interest is in this collection or not. Usually, these local files are accessed during a preview of the DNS settings before switching domains from one host.
Here’s how to check your Local Hosts files across different platforms :
On Windows devices
- Step 1: Go to the Start Menu and look out for the text editor. Right-click on it and pick the option that says Run as Administrator. These text editors could be anything from Notepad to Atom or even Sublime.
- Step 2: Now, in the text editor that you’ve chosen, click on File and open this specific location- C: \Windows\System32\drivers\etc.
- Step 3: Next up, click on hosts files and verify if the webpage that you’re looking for isn’t mentioned there. In case it is, always remove it from the list.
On Macs
- Step 1: Navigate to Utilities and click on Terminal.
- Step 2: Now, type in the following command sudo nano \private\etc\hosts and press Enter. You might need the administrator password to get access.
- Step 3: Verify if the website you’re interested in viewing is not a part of the list of addresses mentioned in the host files. Delete it in case if you happen to find it.
7) Restarting your computer/ laptop
As much as it sounds like a cheap hack, restarting your personal computer or laptop can clear out a lot of unnecessary temporary cache. This could sometimes end up effectively correcting the dns_probe_finished_nxdomain error. So, restarting your device is a handy last resort in case all the other methods mentioned above fail.
How to fix “dns_probe_finished_nxdomain” on Android phones?
The steps to fixing the “dns_probe_finished_nxdomain” error vary slightly from one Android version to another. Here’s a handy guide for you to go by.
For Android 9 Pie and later versions
This edition is different from its predecessors by the fact that it actually does support system-wide DNS settings. This means that you don’t need to modify network settings for each individual network. So, here’s how to resolve the issue at hand:
- Step 1: Go to the Settings app on your Android phone.
- Step 2: Tap on Wireless and Networks.
- Step 3: Now, press Private DNS and tap on Private DNS provider hostname.
- Step 4: Type in the hostname dns.google and press Save.
For Android 8.1 Oreo and older versions
Since Android 8.1 Oreo doesn’t support system-wide DNS settings, you’ll need to manually enter the DNS addresses for each individual active network connection. Follow these steps to correct the error in connectivity.
- Step 1: Go to Settings and tap on Wi-fi.
- Step 2: Hold on to the current Network name and tap on Modify Network.
- Step 3: Now, press on Show Advanced Options.
- Step 4: Navigate to IP Settings and change the value from DHCP to Static.
- Step 5: Modify the DNS Settings to the following:
DNS 1- 8.8.8.8, DNS 2- 8.8.4.4
It’s been found that using a VPN does prevent you from encountering this lapse in connectivity. So, it might be worthwhile to use a VPN on your Android phone. There are multiple options to choose from, so do your research before picking one.
How to fix the “dns_probe_finished_nxdomain” error on a Chromebook?
1) Switching to a different server
Chromebook is relatively a new device, but the methods don’t really change around much. You can get the issue resolved by switching to Google’s public server. Follow these steps to do so.
- Step 1: Connect your Chromebook to an existing Wi-fi or cellular network.
- Step 2: Tap on the Time toolbar at the bottom right corner of your Chromebook.
- Step 3: You’ll now find your network in the list of available networks.
- Step 4: Press on the option that says Google name servers option.
2) Temporarily disabling antivirus applications
Alternatively, like in the case of Windows devices, you can always try disabling conflicting antivirus applications. But, remember that switching off antivirus applications temporarily does mean that you’re prone to malicious malware and viruses when you try to access certain web pages. So, consider this method only if you’re sure that the website you’re trying to open is definitely safe to access.
3) Resetting your access point
In some cases, turning your access point off and turning it back on has been found to resolve the “dns_probe_finished_nxdomain error.” So, try to restart the Access Point and notice if there are any signs of the connectivity getting better.
4) Checking the system for any malicious malware
The “dns_probe_finished_nxdomain” error could be because of a virus corrupting your system. Like, for instance, the STOP\DJVU malware is seen to specifically afflict the Windows HOSTS files and modifies the list of domains. So, there’s a chance that you could be experiencing trouble in connecting.
The method for checking the HOSTS files on a Chromebook doesn’t vary much from a Windows device. The steps or more or less identical. But, in cases where you think that the device’s been subjected to a lethal ransomware attack, then try running RESTORO or INTEGO. It should ideally fix any sort of impending damage to your system and thus keeping your precious images and videos safe and secure.
Conclusion
The “dns_probe_finished_nxdomain” error is a fairly common problem that users across multiple platforms and different devices face. There are a large number of solutions to choose from which vary in complexity.
These range from something as simple as restarting your computer or phone and resetting Google Chrome to something relatively harder like flushing the DNS server addresses and reconfiguring your Network Settings.
One of these methods should ideally correct this error, but in case it continues to persist, it might be a good idea to contact a qualified IT technician.
