Imagine coming home after a busy day at work, hoping to find some solace in the deep confines of the wonderful world of the Internet, only to be disappointed by a flash message that says, “wifi connected but no internet.”
It’s an extremely frustrating situation that can send even the best of us on a downward spiral. So, why do you see this message? Are there some quick fixes that are almost guaranteed to work?
Table of Contents
Wifi connected but no Internet: What exactly is happening?
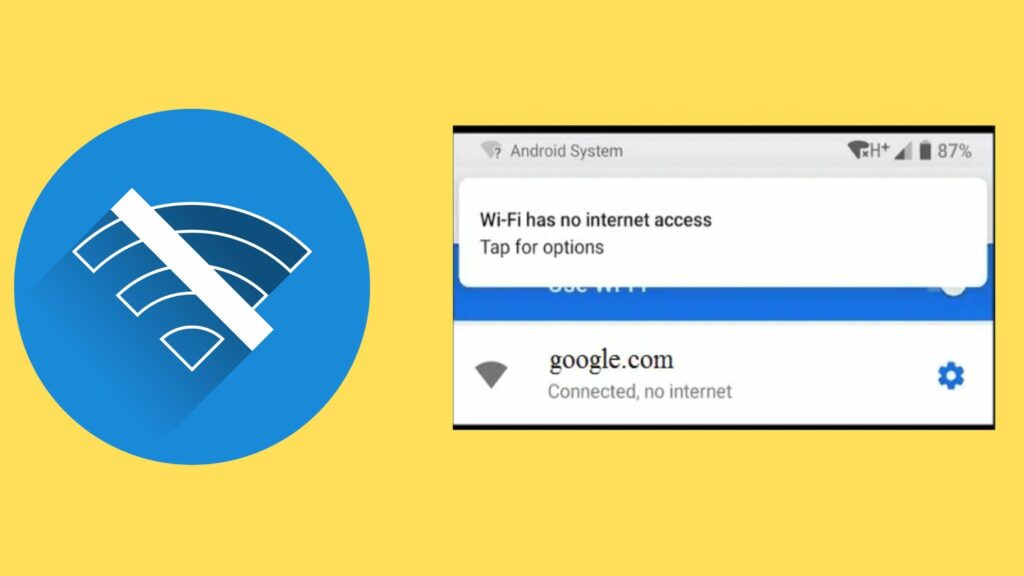
You may commonly see the Wifi connected but no Internet notification as a flash message with a warning triangle with a jet black exclamation mark on Windows computers. The same message takes the form of a black triangle on Android phones or iOS devices. You might also encounter one of these messages:
- Connected, no Internet access
- Wifi has no Internet access
All of these notifications are indicative of the fact that while your device is connected to the network via a router or a modem, there seems to be an issue that is hindering your access to the Internet. Reasons behind this? Plenty!
The fault may lie at your end, wherein your wireless drivers might be outdated, or there might be pre-installed software on your computer or laptop like an antivirus that could be preventing you from accessing the Internet. On the other hand, in some cases, the issue may lie with your Internet Service Provider or your router/ modem.
Before we start troubleshooting and start discussing the different ways to resolve the issue of “wifi connected but no internet,” it’s important to isolate where the fault is. In order to accomplish this, identify if you experience a lapse in connectivity or a whole bunch of users who’re all connected to the same network experience the same. This simple step can go a long way in fixing up the issue without a hassle.
Wifi Connected but no Internet: Methods to consider in case your device is the only one encountering the issue
All of the methods mentioned below works best when the message “wifi connected but no Internet” is localized to just your device.
1. Running the Windows Network Troubleshooter
This is one of the simplest ways to determine where the issue lies. The Windows operating system comes with its own troubleshooting program that should be able to pick up lapses in a jiffy. All you’d need to do is navigate to the Settings icon on the screen and click on Network and Internet option. Scroll down to the Status in the left-hand menu and go to the Network Troubleshooter option. Click on it and see if the program is able to identify the issue at hand and if immediate rectification is possible.
2. Turning off the Fast Startup option
Most devices running on Windows 10 seem to have the Fast Startup option enabled by default. When this mode is active, your computer doesn’t exactly shut down completely. What it essentially does instead is switch out the user and goes into a mode of temporary hibernation. Windows claims that this can enable the computer to boot significantly quicker. But, this improvement comes at the cost of non-renewal of network settings.
So, turning off the Fast Startup option should ideally resolve the “wifi connected but no Internet” issue if that’s the underlying cause. Turning off Fast Startup is rather simple. All you need to do is hold the Windows and the X key together and choose the Power Options next.
This should take you to a separate portal from which you click on Additional Power Settings and pick Choose what the Power can do on the left side of the Menu. Further, select the Change Settings that are currently unavailable and turn off Fast Startup. Don’t forget to save changes and always reboot the device.
3. Uninstalling antivirus software
Yet another overlooked reason for you to experience issues in connectivity could be conflicting applications that could have temporarily blocked access. So, a simple quick-fix is to disable such third-party software.
More often than not, it’s usually Windows Firewall that is the culprit. So, head down to Control Panel and go to System and Security. Next up, click on the Windows Defender Firewall and disable it specifically for the network that you’re encountering trouble connecting to. You may need to do the same for any antivirus software or similar applications on your device that you think might have something to do with you receiving the message “wifi connected but no Internet”.
4. Turning off IPv6
A large number of networks today run on Internet Protocol Version 6 (IPv6), the latest in network protocol. While this is the more advanced of the list, it’s also notorious for causing network problems. So, you can always manually turn off IPv6 on your local network and switch to something more stable like the IPv4 protocol.
This can be done either on your personal device or on the router that you’re using. In the case of a computer, find Network Connections from the Start menu and click on Change Adapter Options. The next step is to navigate to the wifi Adapter settings by opening the Network Adapter options. Click on Properties and disable IPv6. Reboot your computer to confirm and save changes.
The same can be done on a router as well. Find the Network Settings and disable IPv6 from the login menu. But, since the make of every router is different, the steps could vary from one device to another.
5. Changing to a different wireless channel
Your wifi router’s frequency does influence your overall speed. The 5 gigahertz frequency promises faster speeds than the traditional 2.4 gigahertz option. But, it does come with its frequent share of complaints in the form of connectivity issues. So, it might be worth a try to revert back to 2.4 gigahertz and temporarily disable the option for your device to switch to 5 gigahertz frequency automatically.
6. Changing your Domain Name System (DNS)
It’s highly plausible that your DNS settings may have been configured incorrectly during setup or, worse, could have been corrupted by malicious code. In these cases, try changing the DNS server settings to see if there’s any improvement.
You can do this by first opening the Run menu by holding the Windows and the R key together. Type in control/nameMicrosoft.NetworkAndSharingCenter. This should take you to a different window where you click on Wifi and go to Properties. Another window will appear in front of you, showing your IP address and DNS server. Choose Use the Following DNS Server Address and set the preferred DNS server to 8.8.8.8 and alternate DNS server to 8.8.4.4 and confirm changes.
7. Updating Network Adapter Drivers
Most users often forget to update their network adapter drivers. This can cause a problem in connectivity as the computer, and the driver fails to work together effectively. To successfully update your drivers, head to the Search bar on your computer and open Device Manager.
Click on Network Adapters from the long list of options that appear in front of you. Next, go to the Wireless option and click on the option that says Update the Driver. That should do it, but in some exceptional cases, you might need to manually install the drivers. You should be able to obtain these drivers directly from your manufacturer.
8. Verifying the validity of your IP address
If all other steps fail, then your computer might simply have an invalid IP address. To check if your IP address is indeed valid or not, you’ll need to find the Network and Internet Settings from the network icon from your taskbar.
From there on, go to Change Adapter Options and choose your network. From the window that appears, click on Properties and pick the entry named Internet Protocol Version 4. Now, verify if the IP addresses and the DNS server addresses are set to be obtained automatically. If not, then change it.
Connected to the Wifi but no Internet Access: Fixes to consider in case all the devices connected to the network seems to face issues
The solutions that were mentioned before focussed on the scenario where the message Wifi connected but no Internet appeared only on your device. The ones listed below are for those situations where the message seems to be seen across all devices connected to the defunct network.
1. Check whether the problem lies with your Internet Service Provider.
One of the possible causes for such a widespread issue in connectivity could be your Internet Service Provider themselves. If you suspect that’s the case, then try switching to cellular data and see if webpages are loading or not. If they are, the underlying issue could be an outage at the level of the service provider.
Try contacting a friend or a family member that uses the same Internet Service Provider as you and ask if they have trouble connecting too. You can then lodge a formal complaint with the firm expressing your grievances or contact Customer Care for further help.
2. Restarting your Router/Modem
If the issue isn’t at the level of the Service Provider, there’s a chance that the fault could lie in your router/modem. A simple way to tackling this issue is by restarting the device. First, turn off the router and unplug it from the power source. Wait for a minute or so and then plug the device back in and turn the device on.
If you own both a router and a modem, plug in the modem first and turn on the router after 2 minutes. Wait for 5-10 minutes and reconnect all your devices. Check if they’re able to connect now and if the “wifi connected but no Internet” message disappears.
3. Resetting your Network Settings
When all the other fixes fail to correct the issue, then resetting your network might be the last resort. You’ll now need to manually set up everything all over again. To do this, go to Settings from the Search bar on your Windows device. Choose the Network and Internet option and click on Status. This will open up a drop-down menu from which you will go to Network Troubleshooter and further click on Network Reset. Follow the step-by-step instructions to completely reset your Network Settings.
Connected to the Wireless Network but no Internet Access: Methods to consider in case of Android devices
While the previous sections have revolved around personal computers and laptops, this section will specifically focus on Android devices. Some of the solutions with respect to the fault which lies in the router, or your Internet Service Provider will remain the same. The other steps worth considering are:
1. Forgetting the wifi network and reconnecting
This is rather an easy fix that involves clicking on Forget button under the wifi Network Settings on your phone and then reconnecting to the same network. What this essentially does is delete your saved preferences. So, when reconnecting, the IP address you’re assigned is different than the one from before. This should hopefully clear up the issue of “Wifi connected but no Internet” if that’s where the issue is.
2. Trying assigning a static IP address to your phone
In case your server fails to assign a specific IP address, you can always choose to manually get a static IP address assigned to your Android device. This step helps avoids cases of conflicts with respect to IP addresses. To do this, go to Settings and click on Wifi. You should see a list of all the available connections. Pick the one you’re using and press on the pencil icon on the side. Tap on Advanced Options from the drop-down menu that appears. Go to IP Settings and tap on Static. Punch in your static IP address in the field and press on Save.
3. Re-configuring the right Address and Time Settings on your phone/tablet
Most users often forget that incorrectly saved Addresses and Time Settings can have a bearing on Internet connectivity. So, try checking if they have been configured correctly. All you need to do is open Settings and tap on System. Next, press on Date and Time and type in the correct particulars in case there’s an error.
4. Resetting Network Settings
The Android operating system is built in such a manner as to remember all the changes you make to your Network Settings. This avoids the hassle of recreating the changes as the operating system takes care of that for you. But, if you’re experiencing trouble in connectivity, then it might be a smart option to reset your Network Settings. But, a word of caution- only attempt this method if you’re aware of how to reconfigure your Network Settings.
To reset the Network Settings on your Android phone, go to the Settings application and click on System Settings all the way down at the bottom of the screen. Press on Reset Options and choose to Reset Wifi, Mobile, and Bluetooth.
5. Attempting a complete factory reset
Consider this method only if all the other steps fail to correct the issue. Since you’re reverting the phone to the state it was when you originally received it, you might potentially end up losing all your precious personal data. So, make sure that all your data, including documents, photos, and videos, have been backed up properly.
Once you’re sure you’re ready to reset the device, go to the Settings app on your phone and head over to System. Tap on Reset Options and choose the option that says Erase All Data. The instructions that will follow should act as a guide to successfully completing the process.
Wifi Connected no Internet: Possible solutions for iPhones/iPads
The overall scheme remains the same across Android and iOS devices, but there might be some small changes. So, here are some solutions to consider if you’re constantly seeing the message “wifi connected but no Internet” on your iPhone or iPad.
1. Restarting your iPhone/iPad
If you’ve worked out that the issue isn’t with the modem or your Internet Service Provider, then try restarting your iPhone. Here’s how to restart your iPhone X, iPhone 11, iPhone 12, or iPhone 13.
Restarting iPhone:
- Method 1: First, long press either of the volume buttons and the side button simultaneously; you should start to see a power-off slider. Now, drag it down to the bottom of the screen and wait for 30 seconds or so. Your phone will power off now. To power it back up again, long press the side button on your device until you begin to see the Apple logo on the screen.
- Method 2: When you try to switch off your device, in some cases, the screen might be unresponsive or could get frozen. In those cases, you’ll need to force restart your iPhone. The method slightly varies from one model to another. Here’s how to force restart an iPhone X, iPhone11, iPhone 12, or iPhone 13.
Hold the volume up button for a couple of seconds and release it quickly. Do the same for the volume down button and side buttons as well. You should now be able to see the Apple logo starting to appear on the screen.
Restarting iPad:
To restart your iPad, long press either of the volume buttons and the top button simultaneously. Just like in the case of an iPhone, a power slider should appear. Drag it down to the bottom of the screen and wait for 30 seconds or so for your device to shut down completely. To power it back up again, long press the top button until you start to see the Apple logo start to appear. In cases where the screen turns unresponsive, force restart your device the same way you would an iPhone.
Alternatively, if your iPad comes with a home button, you can always press and hold it until the power slider appears. The rest of the steps are essentially the same. If the screen turns unresponsive, force restart your iPad by pressing and holding the top and Home buttons simultaneously. You should start to see the Apple logo on the screen. This is your cue to release the buttons.
2. Resetting your Network Settings
The fundamental purpose behind the method is the same as that in a Windows or Android device. On your iPhone, navigate to the Settings app and tap on General, and then on Reset Network Settings. This will also delete all your previously remembered wifi Networks and passwords, VPN Settings. So, always consider this as your last resort since you’ll need to save up all the network preferences all over again.
Conclusion
Wifi connected but no Internet is one of the most common issues encountered by uses across a variety of platforms. Once you’ve localized where the problem is, try all of the methods suggested above. These steps range from a simple restart of your device to more complicated ones like flushing your DNS server addresses or performing a complete factory reset. One of them should ideally work in correcting the lapse in connectivity. But, in cases where you can’t, try contacting an IT professional and let them try troubleshooting the issue.
