Platform to Showcase Innovative Startups and Tech NewsPlatform to Showcase Innovative Startups and Tech News
    Facebook Twitter Instagram
    Platform to Showcase Innovative Startups and Tech NewsPlatform to Showcase Innovative Startups and Tech News
    Facebook Twitter YouTube
    • Featured Startups
    • Funding News
    • CEO Interviews
    • Startup Resources
    • Inspiring Stories
    • Submit Startup
      • Pitch VCs
    • More
      • Our Team
      • Advertise
      • Write for us
      • Privacy policy
      • Startup listing
      • Steal The Deal
      • Contact
    Platform to Showcase Innovative Startups and Tech NewsPlatform to Showcase Innovative Startups and Tech News
    Home»Software»Install Apache PHP MySql on MAC Lion
    Software

    Install Apache PHP MySql on MAC Lion

    TechPluto StaffBy TechPluto StaffApril 9, 20143 Mins Read
    Facebook Twitter LinkedIn Email
    Share
    Facebook Twitter LinkedIn Email

    In this tutorial we will show you how to install Apache server to run PHP and MySql on MAC OS X Lion.

    This is a complete tutorial to teach you the method to install Apache PHP MySQL on Mac OS X Lion. Users have been facing difficulties in installing the Apache PHP MySQL on Mac OS X Lion and later versions since the hosting environment have been changed completely.
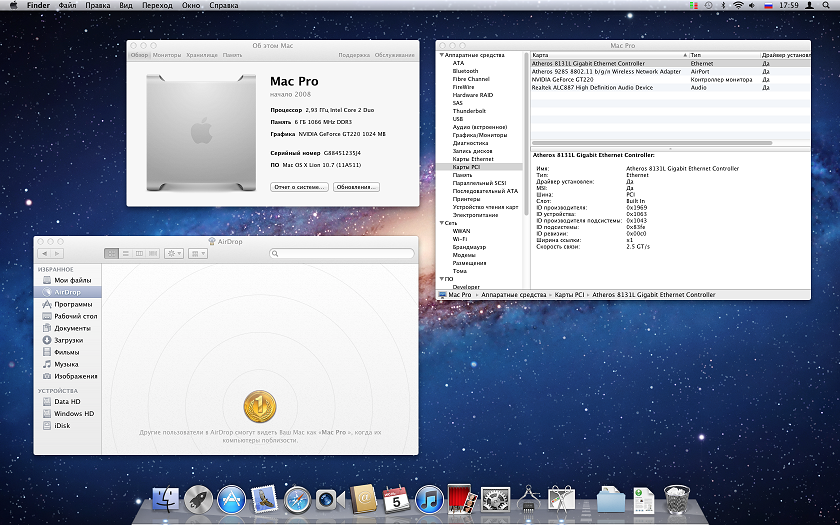
    Install Apache PHP MySql on MAC Lion

    Also, there is an option available for web sharing in GUI format. 

    Steps for  installing Apache server to run PHP and MySql on MAC OS X Lion:

    Step 1 : Start the Apache Web Server

    As far as Mac OS X Lion is considered, Apache server comes pre-installed into it. So, you just have to start it and you need not install it manually. Go to the Applications folder, then go to the Utilities sub-folder inside it and click on Terminal. Once the terminal gets opened, you can run the following command to start Apache server:
    Sudo apachectl start
    As soon as you press enter after typing this command, server would be started and in order to confirm the same, you can open your browser and open localhost. You can also stop and restart the server using the appropriate commands. In order to know what version of Apache server your operating system comes with, you can also use the command for finding the version of the Apache.

    Step 2: Configure Apache and Enable PHP

    The configuration file of the Apache server would need to be edited in order to make it run PHP scripts. You can open the required configuration file by typing the following command in the editor:
    Sudo nano/etc/apache2/httpd.conf
    As soon as you press enter, configuration file would be opened and you would see that PHP has been disabled by commenting the line php5_module libexec/apache2/libphp5.so. All you have to do is to remove the # sign in front of it so that comment is removed and then, PHP would ne enabled automatically.

    Step 3: Download SQL

    The next part is to install MySQL on Mac OS X Lion. For that, first of all, you would need to download the MYSQL file. You can download it from the official website of MySQL. Remember to choose the version as per your operating system. You can download it without signup. It would be downloaded in a package format which would contain 3 components.

    Step 4: Install the Components

    The three components, namely mysql – 5.6.10 – osx10.6- x86_64.pkg, MySQL-prefPane and MySQL startupitem.pkg would be installed.

    Step 5: Start MySQL

    Either you can start MySQL using the command line interface or you can use the GUI as well. For starting it using the command line interface, type the following command in the editor:
    Sudo /usr/local/mysql/support-files/mysql.server start
    For staring using the GUI, you would need to click on the start MySQL button that appears as soon as you install the MySQL.prefPane package.

    Step 6: Set Password

    For using MySQL, you would need to set up a root password; you can do the same by using following command:
    /usr/local/mysql/bin/mysqladmin –u root password ‘password’

    Now you have successfully installed apache PHP MySQL on your Mac OS X Lion. You can test the software by running it initially.

    Related Articles :

    Know more about windows 8 pre Xtreme Edition

    Installing Windows 8 Professional without Product Key?

    How to Make Money using Google Trends .

    Share. Facebook Twitter LinkedIn Email
    TechPluto Staff
    • Website

    Related Posts

    How to Disable Taboola News: Removing Annoying Recommendations from Your Android Phone

    May 23, 2023

    How to Fix Packet Loss

    May 5, 2023

    Why Does YouTube Keep Crashing

    April 28, 2023

    How to Easily Improve Your Internal Communications Policy to Uplevel Your Team’s Productivity

    April 26, 2023

    Leave A Reply Cancel Reply

    Popular Post
    • Why is one Airpod louder than the other- reason and fixes Why Is One Airpod Louder Than The Other- Reason And Fixes
    • Is Real Estate Investment Trusts a Good Career Path Is Real Estate Investment Trusts a Good Career Path? [Complete Guide]
    • advertisement examples 16 Creative Product Advertisement Examples & Ad Campaigns You Must See
    • Places that hire at 15 Places that Hire at 15 Years – Top Choices for Teenagers
    • Pestel Analysis PESTEL Analysis – What it Means and its 6 Factors Explained
    Category Posts
    • how to upload more than 100mb to discord How to Upload More Than 100MB to Discord: Unlocking File Size Limits
    • how to clear spotify queue How to Clear Spotify Queue: Enjoy a Fresh Listening Experience
    • how to stop facebook from scrolling automatically How to Stop Facebook from Scrolling Automatically: Taking Control of Your Browsing Experience
    • how to use depth effect ios 16 How to Use Depth Effect on iOS 16: Unlocking the Power of Visual Depth
    • Twitter launches new $5000 API plan for Startups  
    Our Partners
    Shopping online for Windows tablet - DHgate
    Platform to Showcase Innovative Startups and Tech News
    Facebook Twitter YouTube
    • Popular Posts
    • Advertise
    • Submit A Startup
    • Privacy policy
    • Disclaimer
    © 2023 Techpluto. Designed by Techpluto.

    Type above and press Enter to search. Press Esc to cancel.

    Catch the latest news from Startup World in your Inbox!
    [email protected]