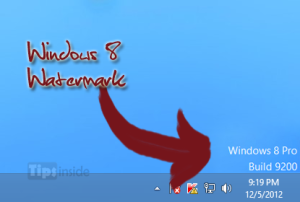
Here in this post we will tell you how to remove Windows 8 watermark from desktop. Complete procedure is explained below:
Watermark is a build number of the windows or the service pack, you will find watermark on testing version of any windows or service pack. Many of us do not desire the complicated numbers on our beautiful wallpapers as these watermarks may hide some part of wallpaper and it doesn’t complement the desktop look.
In Windows 8, the watermark –string is saved in system file as shell32.dll.mui. Windows 8 shows the watermark but different process. When a user sets any image on desktop, Window automatically copies the image in the hidden folder and after that puts the watermark on the image, and that is shown up as a desktop image. It is possible to delete the watermark if watermark is removed from the image file, THEN IT WILL NOT APPEAR ON THE DESKTOP.
There are several methods to remove the watermark from desktop. You can modify the system file by resource hacker, it is the most used tool to remove the watermark. There are also third party utilities that can help you get rid of watermark.
Instructions 
One method is replacing hidden JPG image with watermark with the JPG image that we have, steps are shown below:
1. The first step you have to follow is set your desktop image according to your choice or you can leave it as the default Window 8 – wallpaper.
2. After you have set your choice of desktop wallpaper, you have to copy the text given below:
%appdata%MicrosoftWindowsThemes
3. Now WIN + R keys are to be pressed for opening RUN- dialog box, and pasting the text given above in the dialog box and then pressing enter tab.
4. After this you will see “Themes Folder” inside Windows Explorer, here you will see a folder named “Cached Files” and another image file named as “TranscodeWallpaper.jpg”.
TranscodeWallpaper.jpg contains wallpaper that you have selected for setting on your desktop, and cached image is in the folder of the “Cached Files” that is utilized by windows for displaying wallpaper on the desktop. In other words, it is a copy of TranscodeWallpaper.jpg file copy which has watermark included on it.
5. As the above step is complete, you need to click on “TranscodeWallpaper.jpg” file, by pressing “Ctrl + C” keys. Now your file will be copied. You have to press “Ctrl + V” key for creating image file copy in the same folder. Using Right-click menu option the same thing can be done.
6. Now you have to open the folder of “CachedFiles”, here you will find the image file named “CachedImage_xxx.jpg”. This is the actual file that is being displayed in your desktop. This is automatically created when you set the desktop image.
7. Tap F2 Key by clicking on the image file, or you can do, right clicking on file and selecting “rename” option and copying the name.
8. Go back to the precious folder and rename it by “TranscodedWallpaper – Copy.jpg”, now paste copied text string.
9. Cut the new image from Themes and paste into the folder of “CachedFiles”. Confirm and select “Replace the file in the destination folder” option.
10. Now after closing the folder, refresh the Desktop, and you will see that the watermark is vanished.

