In today’s tech-savvy world, upgrading to a new iPhone is always exciting. However, the thought of transferring contacts from one iPhone to another can be daunting. In this article, we will explore various methods on “How Can You Transfer Contacts from iPhone to iPhone,” ensuring a smooth transition to your new device.
Table of Contents
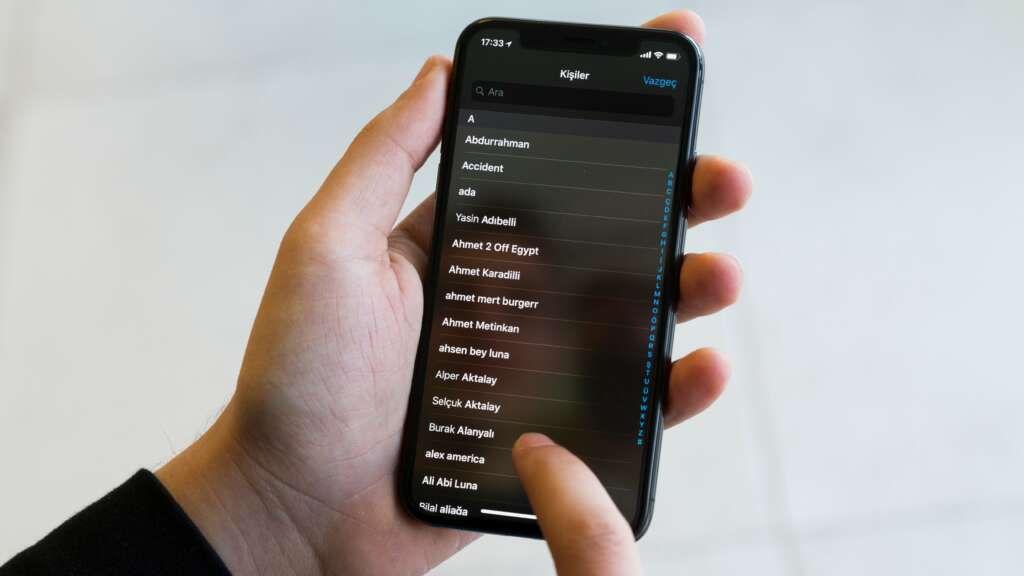
How Can You Transfer Contacts from One iPhone to Another
Transferring contacts from one iPhone to another is a common necessity when upgrading to a new device. Fortunately, Apple has made this process straightforward and user-friendly. Here’s a step-by-step guide on “How Can You Transfer Contacts from One iPhone to Another”:
Using iCloud Sync:
- Ensure iCloud Backup is Enabled: On your old iPhone, go to Settings > [your name] > iCloud. Make sure the Contacts toggle is turned on. This action ensures that your contacts are synced with your iCloud account.
- Connect to Wi-Fi: Make sure both your old and new iPhones are connected to a Wi-Fi network. This is crucial for syncing contacts through iCloud.
- Sync Contacts to Your New iPhone: On your new iPhone, during the setup process, sign in with the same Apple ID used on your old iPhone. Proceed with the setup and choose Restore from iCloud Backup when prompted. Select the most recent backup of your old iPhone. If your new iPhone is already set up, go to Settings > [your name] > iCloud, and toggle on Contacts. Your contacts should start syncing automatically.
Using AirDrop:
- Enable AirDrop: On both iPhones, swipe up from the bottom of the screen (or down from the top right corner on iPhone X and later) to open the Control Center. Press and hold the network settings card and enable AirDrop. Choose “Contacts Only” or “Everyone” to make your device discoverable.
- Select Contacts to Share: On your old iPhone, open the Contacts app and select the contact(s) you wish to transfer. You can select multiple contacts by tapping on “Edit” and then selecting the desired contacts.
- Share via AirDrop: Tap on the “Share Contact” option and choose AirDrop. Your new iPhone should appear as an option. Tap on it, and accept the incoming contacts on your new iPhone.
Using iTunes or Finder:
- Backup Old iPhone: Connect your old iPhone to a computer and open iTunes (or Finder on macOS Catalina and later). Select your device and click “Back Up Now” to create a backup of your old iPhone, including contacts.
- Restore Backup on New iPhone: Connect your new iPhone to the computer. In iTunes or Finder, select your new device and choose “Restore Backup”. Select the backup you just made from your old iPhone. This process will transfer all data, including contacts, from your old iPhone to your new one.
Quick Start Device-to-Device Transfer:
For iPhones running iOS 12.4 or later, you can use the Quick Start feature for a device-to-device transfer.
- Initiate Quick Start: Bring your new iPhone close to your old iPhone. The Quick Start screen should appear on your old iPhone, offering you the option to set up your new iPhone using your Apple ID.
- Follow Instructions: Follow the on-screen instructions. An animation will appear on the new iPhone. Hold your old iPhone over the new one to center the animation in the viewfinder.
- Finish Setup: Enter your old iPhone’s passcode on your new iPhone and follow the setup prompts. Choose to transfer data directly from one iPhone to another.
By following these methods, you can ensure a smooth transition of contacts from your old iPhone to your new one. Whether you prefer the simplicity of iCloud, the direct transfer of AirDrop, the reliability of iTunes, or the convenience of Quick Start, “How Can You Transfer Contacts from One iPhone to Another” is a question with multiple easy solutions.
How Can You Transfer Your Contacts from Android to iPhone
Moving from an Android device to an iPhone involves transferring various types of data, including your contacts. Apple has streamlined this process to ensure a smooth transition for new iPhone users. Below is a comprehensive guide on “How Can You Transfer Your Contacts from Android to iPhone”:
Using the Move to iOS App:
- Download Move to iOS: Before starting the setup process on your new iPhone, download the “Move to iOS” app on your Android device from the Google Play Store.
- Start the Setup on Your New iPhone: While setting up your new iPhone, look for the “Apps & Data” screen and select “Move Data from Android.”
- Open Move to iOS on Your Android Device: Launch the “Move to iOS” app on your Android phone and tap “Continue.” Read the terms and conditions that appear and tap “Agree” to proceed. Then, tap “Next” in the top-right corner of the “Find Your Code” screen.
- Generate a Code on Your iPhone: On your new iPhone, tap “Continue” on the “Move from Android” screen. A ten- or six-digit code will appear.
- Use the Code: Enter the code on your Android device. After entering the code, your Android device will connect to your new iPhone over a temporary Wi-Fi network.
- Select Data to Transfer: Once connected, your Android device will display a screen where you can select the types of data you wish to transfer. Ensure “Contacts” is selected, along with any other data you wish to move. Then, tap “Next.”
- Wait for the Transfer to Complete: The transfer process will begin, and it may take some time, depending on the amount of data being transferred. Keep both devices near each other and powered on until the loading bar on your iPhone finishes.
- Finish Setting Up Your iPhone: After the loading bar completes on your iPhone, tap “Done” on your Android device. Then, follow the on-screen instructions to finish setting up your new iPhone.
Using Google Account Sync:
If your contacts are synced with your Google account, you can easily transfer them to your iPhone by adding your Google account:
- Add Google Account to Your iPhone: On your iPhone, go to “Settings” > “Mail” > “Accounts” > “Add Account” and select “Google.” Enter your Google account credentials and sign in.
- Enable Contact Sync: After signing in, you’ll have the option to select which types of data you’d like to sync with your iPhone. Make sure the “Contacts” toggle is turned on.
- Sync Your Contacts: Once you’ve enabled contact sync, your Google contacts will begin syncing with your iPhone. Depending on the number of contacts, this process might take a few minutes.
Using a SIM Card:
If your contacts are stored on your Android device’s SIM card, you can transfer them by moving the SIM card to your iPhone (if compatible):
- Transfer the SIM Card: Power off both devices. Use a SIM card ejector tool to remove the SIM card from your Android device and insert it into your iPhone.
- Import Contacts: On your iPhone, go to “Settings” > “Contacts” and select “Import SIM Contacts.” Choose where you’d like to import your contacts (to your iPhone or a connected account like iCloud).
By following these methods, you can easily transfer your contacts from an Android device to an iPhone, ensuring you stay connected with your important contacts after switching devices. Whether you prefer the ease of the Move to iOS app, the convenience of syncing with a Google account, or the simplicity of using a SIM card, “How Can You Transfer Your Contacts from Android to iPhone” has several viable solutions.
How Can You Transfer Contacts from Samsung to iPhone
Transitioning from a Samsung device to an iPhone involves moving important data, including your contacts. Fortunately, there are several straightforward methods to ensure your contacts make the journey from your Samsung to your new iPhone seamlessly. Here’s a detailed guide on “How Can You Transfer Contacts from Samsung to iPhone”:
Using the Move to iOS App:
The Move to iOS app is designed by Apple to make it easy for Android users to transfer their data, including contacts, from their existing device to a new iPhone.
- Prepare Your Devices: Ensure both your Samsung device and your new iPhone are charged and have Wi-Fi connectivity.
- Download Move to iOS on Your Samsung: Go to the Google Play Store on your Samsung device and download the “Move to iOS” app.
- Set Up Your New iPhone: During the setup process of your new iPhone, you will reach the “Apps & Data” screen. Select the “Move Data from Android” option.
- Open Move to iOS on Your Samsung: Launch the app on your Samsung device, agree to the terms and conditions, and tap “Continue” to proceed to the “Find Your Code” screen.
- Generate a Code on Your iPhone: Tap “Continue” on your iPhone’s “Move from Android” screen. A code will appear. Enter this code on your Samsung device.
- Select Data to Transfer: Your Samsung device will connect to your iPhone via a private Wi-Fi network. Once connected, select “Contacts” and any other data you wish to transfer, then tap “Next”.
- Complete the Transfer: Wait for the transfer process to complete. Keep both devices near each other and avoid using them until the transfer is complete.
Using a Google Account:
If your contacts are synced with your Google account on your Samsung device, you can easily transfer them to your iPhone by adding your Google account to it.
- Add Your Google Account to Your iPhone: On your iPhone, navigate to “Settings” > “Mail” > “Accounts” > “Add Account” and select “Google”. Log in with your Google credentials.
- Sync Your Contacts: Make sure the “Contacts” toggle is enabled when you add your Google account. This will automatically sync your Google contacts to your iPhone.
Using a VCF File:
Another method involves exporting your contacts to a VCF file and then importing them to your iPhone.
- Export Contacts on Your Samsung: Open the Contacts app on your Samsung device, go to “Manage Contacts” > “Export” and save your contacts as a VCF file.
- Transfer the VCF File to Your iPhone: You can email the VCF file to yourself or use a cloud storage service. Access the VCF file on your iPhone and open it. You will be prompted to add all contacts to your iPhone.
Using a SIM Card:
If your contacts are stored on your SIM card, you can physically move the SIM card to your iPhone, provided it is compatible.
- Transfer the SIM Card: Power off both your Samsung device and your iPhone. Use a SIM ejector tool to move the SIM card from your Samsung to your iPhone.
- Import Contacts on Your iPhone: Go to “Settings” > “Contacts” on your iPhone and select “Import SIM Contacts”. Choose where you want to import the contacts to (your iPhone’s storage or a cloud account).
By using one of these methods, you can efficiently transfer your contacts from a Samsung device to an iPhone. Whether you prefer the straightforward approach of the Move to iOS app, the simplicity of syncing with a Google account, the manual method of using a VCF file, or the direct transfer of a SIM card, “How Can You Transfer Contacts from Samsung to iPhone” can be achieved with minimal hassle.
How Can You Transfer Contacts from iPhone to Samsung
Switching from an iPhone to a Samsung smartphone involves transferring your valuable data, including your contacts. While moving from Apple’s iOS to Android might seem challenging, there are efficient methods to ensure your contacts are transferred smoothly. Here’s how you can transfer contacts from iPhone to Samsung:
Using Smart Switch:
Samsung’s Smart Switch app is designed to facilitate the transfer of data, including contacts, from various devices to Samsung devices.
- Download Smart Switch: On your new Samsung device, ensure Smart Switch is installed. It’s typically pre-installed, but if not, you can download it from the Google Play Store or Samsung Galaxy Store.
- Prepare Both Devices: Ensure both your iPhone and Samsung are charged and have Wi-Fi connectivity. If you’re transferring data wirelessly, keep both devices close together during the process.
- Backup Your iPhone Data: Use iCloud or iTunes to create a backup of your iPhone data. For iCloud, go to “Settings” > [your name] > “iCloud” > “iCloud Backup” on your iPhone and select “Back Up Now”.
- Open Smart Switch on Your Samsung: Launch Smart Switch and select “Receive data”. Choose “iPhone/iPad” and then decide whether you want to transfer data from an iCloud backup or directly from the iPhone using a USB cable.
- For iCloud Transfer: Enter your iCloud details when prompted, and select the backup you wish to transfer. Choose “Contacts” and any other data you want to move, then tap “Import”.
- For Cable Transfer: Use a USB cable and an adapter (if necessary) to connect your iPhone to your Samsung device. Smart Switch will guide you through the process. Select “Contacts” from the list of data types you wish to transfer.
- Transfer Contacts: Follow the on-screen instructions on your Samsung device to complete the transfer. The time it takes will depend on the amount of data being transferred.
Using Google Account Sync:
If your contacts are synced with your Google account, transferring them to your new Samsung device is straightforward.
- Sync iPhone Contacts with Google: On your iPhone, go to “Settings” > “Mail” > “Accounts” > “Add Account” and select “Google”. Enter your Gmail credentials and make sure the “Contacts” toggle is turned on to sync your contacts with your Google account.
- Add Google Account to Your Samsung: On your Samsung device, go to “Settings” > “Accounts and backup” > “Accounts” > “Add account” > “Google” and log in with the same Google account.
- Sync Contacts: Ensure the “Sync Contacts” option is enabled for your Google account on your Samsung device. Your Google contacts, including those from your iPhone, will automatically sync to your Samsung.
Using a VCF File:
Exporting your iPhone contacts to a VCF file and then importing them to your Samsung device is another method.
- Export Contacts from iPhone: Use your iPhone to export contacts to a VCF file. This can be done using various third-party apps available on the App Store.
- Transfer the VCF File to Your Samsung: Email the VCF file to yourself or use a cloud service to transfer it. Open the VCF file on your Samsung device to import the contacts.
By utilizing one of these methods, transferring contacts from an iPhone to a Samsung device can be accomplished with ease. Whether you prefer the convenience of Samsung’s Smart Switch, the synchronization capabilities of a Google account, or the manual approach of using a VCF file, “How Can You Transfer Contacts from iPhone to Samsung” is a process designed to be user-friendly and efficient, ensuring a smooth transition to your new Samsung smartphone.
How to Transfer Contacts with iCloud
Transferring contacts with iCloud is a seamless process that ensures your contacts are not only backed up but also easily accessible across all your Apple devices. This method is particularly useful when you’re upgrading to a new iPhone or need to ensure that all your devices have the same contact information. Here’s a step-by-step guide on “How to Transfer Contacts with iCloud”:
Enabling iCloud Contacts on Your iPhone:
- Sign in to iCloud: Ensure that you are signed in to iCloud with your Apple ID on your iPhone. Go to “Settings”, tap on your name at the top, and then tap “iCloud”.
- Enable Contacts Sync: In the iCloud settings, find the “Contacts” toggle and switch it on. This action will prompt you to merge any existing contacts on your iPhone with iCloud.
- Verify the Sync: Once enabled, your contacts will automatically sync with iCloud. To verify, you can visit the iCloud website from a web browser, sign in with your Apple ID, and check if your contacts appear under the “Contacts” section.
Accessing iCloud Contacts on a New Device:
When setting up a new iPhone or needing to access your contacts on a different Apple device, ensure that you sign in with the same Apple ID used to sync the contacts initially.
- Sign in to iCloud: On the new device, go through the setup process and sign in with your Apple ID when prompted. If the device is already set up, go to “Settings”, tap “Sign in to your [device]”, and enter your Apple ID credentials.
- Enable Contacts: Navigate to “Settings” > [your name] > “iCloud”, and toggle on “Contacts”. This will start syncing your iCloud contacts to the device.
Managing iCloud Contacts:
iCloud not only syncs your contacts across devices but also allows you to manage them easily.
- Editing Contacts: You can edit your contacts on any device synced with iCloud, and the changes will be updated across all devices. Simply open the Contacts app, select the contact you wish to edit, and tap “Edit”.
- Adding Contacts: When you add a new contact to your device with iCloud Contacts enabled, it will automatically sync to your iCloud account and be accessible on all your devices signed in with the same Apple ID.
- Deleting Contacts: If you delete a contact on one device, it will be removed from all devices synced with your iCloud account. Be cautious with deletions, as this action is irreversible once your device syncs with iCloud.
Troubleshooting Tips:
- Ensure Wi-Fi Connectivity: iCloud sync requires an internet connection. Make sure your device is connected to Wi-Fi to sync your contacts.
- Check iCloud Storage: If your iCloud storage is full, your contacts won’t sync. Check your storage in “Settings” > [your name] > “iCloud” > “Manage Storage”.
- Update iOS: Ensure that your devices are running the latest version of iOS. Go to “Settings” > “General” > “Software Update” to check for updates.
By following these steps, “How to Transfer Contacts with iCloud” becomes a straightforward process, ensuring that your contacts are always up-to-date and accessible across all your Apple devices. iCloud not only offers a hassle-free way to transfer contacts but also provides a secure backup solution, keeping your valuable connections safe.
How to Transfer Contacts from One iPhone to Another with iTunes
Transferring contacts from one iPhone to another using iTunes is a traditional method that involves backing up your old device and restoring the backup to your new iPhone. This method is useful for those who prefer a wired connection or do not use iCloud. Here’s a detailed guide on “How to Transfer Contacts from One iPhone to Another with iTunes”:
Backing Up Your Old iPhone:
- Update iTunes: Ensure you have the latest version of iTunes installed on your computer. You can check for updates through the iTunes app or download the latest version from Apple’s website.
- Connect Your Old iPhone: Use a USB cable to connect your old iPhone to your computer. If a message asks for your device passcode or to “Trust This Computer,” follow the onscreen steps.
- Select Your Device: Open iTunes and select your device from the top left corner.
- Back Up Your Device: Under the “Backups” section, choose “This computer” for the backup location. Ensure “Encrypt local backup” is checked if you want to back up Health and Activity data. Click “Back Up Now” to start the backup process. Wait for the backup to complete before disconnecting your iPhone.
Restoring the Backup to Your New iPhone:
- Turn On Your New iPhone: Start the setup process on your new iPhone. Follow the onscreen setup steps until you reach the “Apps & Data” screen.
- Select Restore from iTunes Backup: On the “Apps & Data” screen, choose “Restore from iTunes Backup” and then tap “Next”.
- Connect Your New iPhone to iTunes: Connect your new iPhone to the computer where you backed up your old iPhone. Open iTunes and select your new iPhone.
- Restore Backup: Under the “Backups” section, click “Restore Backup”. Choose the most recent backup of your old iPhone. If your backup is encrypted, you will need to enter the password.
- Wait for the Restore Process: The restore process will transfer all data, including contacts, from the backup to your new iPhone. Keep your device connected after it restarts and wait for it to sync with your computer.
Final Steps:
- Check Your Contacts: Once the sync is complete, you can disconnect your new iPhone and check to ensure that your contacts have been transferred successfully.
- Update Your New iPhone: Ensure your new iPhone is updated to the latest version of iOS. Go to “Settings” > “General” > “Software Update” to check for any available updates.
Tips for a Smooth Transfer:
- Backup Encryption: If you’ve encrypted your backup, remember the password. You’ll need it to restore the backup to your new iPhone.
- iTunes Alternatives: If you encounter issues with iTunes, consider using Finder (on macOS Catalina and later) for the backup and restore process, which follows a similar procedure.
- Backup Regularly: Regularly backing up your iPhone ensures that your data is safe and can be easily transferred to a new device when needed.
By following these steps, “How to Transfer Contacts from One iPhone to Another with iTunes” can be accomplished efficiently. This method not only transfers contacts but also moves other data, ensuring your new iPhone feels familiar right from the start.
