In this post we will guide you how to Clear Cache in Windows 8.Here are the details.
Cache is a temporary storage space which has been provided to match the speed of RAM and the hard disk. The data before going to RAM (as RAM is limited) is stored in cache memory. Sometimes when the programs or documents have been closed, they still remain in cache for faster future access. It would be really nice to clear this cache memory in order to make your device run smoothly.
There are basically three types of cache viz. DNS Cache, Thumbnail Cache and Memory Cache. In this post we will learn how to clear each cache in Windows 8 in some very basic and simple steps. So let us begin
-
Clearing the DNS Cache
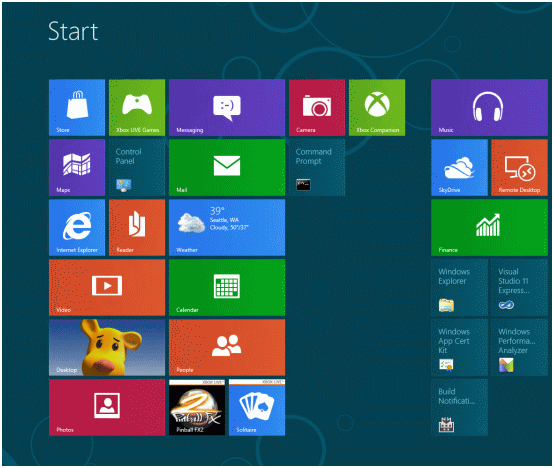
1. Open the Windows 8 in Metro UI and have a look at the main desktop. You will find a command prompt tile there. Just right click that tile and then select the ‘run as administrator’ option.
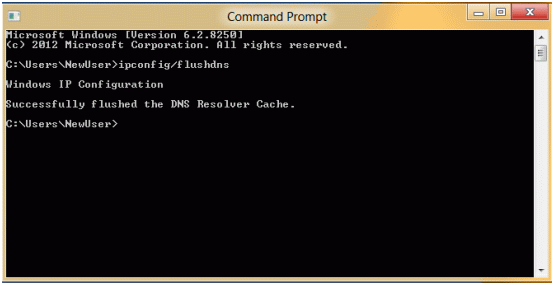
2. Once you are in the Command Prompt mode, type ipconfig /flushdns command and then press enter. When done, you would notice a message ‘successfully flushed the DNS resolver cache’. This means that your DNS cache has now been cleared.
-
Clearing the Memory Cache
If you sometimes face the problem of your Windows 8 device getting slow and a bit floppy, it means that you need to clear the unused RAM. Use the procedure explained below and you will notice improvement in your device’s performance.
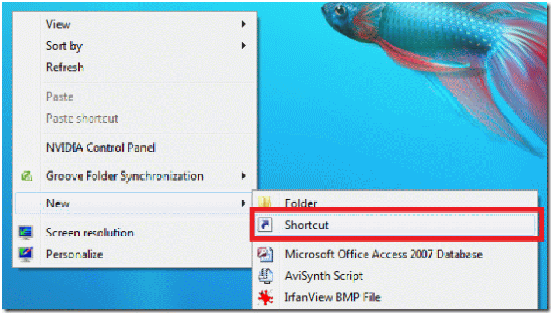
1. Right click in an empty area on your desktop and then select New -> Shortcut.
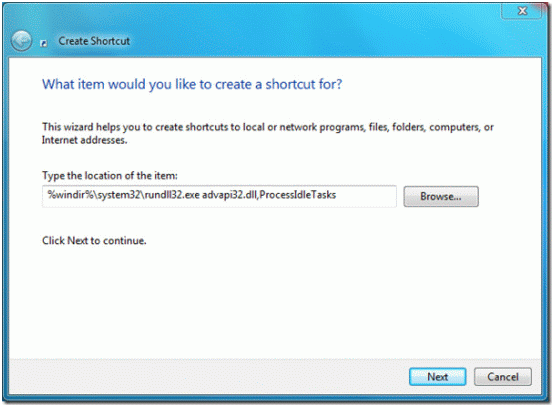
2. Next, you will be asked for a location. When required enter the following line in the location field:
%windir%\system32\rundll32.exe advapi32.dll,ProcessIdleTasks
And click the next button.
3. Give this shortcut any desirable name that you want for your understanding and then click the ‘finish’ option.
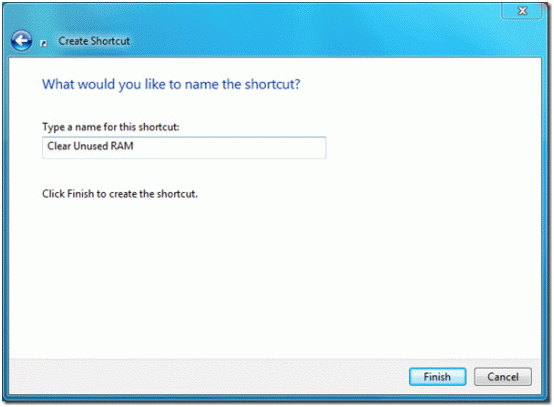
4. Now whenever your device becomes slow and you need to clear the memory cache, just execute this shortcut and you will see a noticeable improvement in your system’s performance.
-
Clearing the Thumbnails Cache
Thumbnail cache is related to your hard disks and can be useful for clearing the hard disk space. The procedure is as follows:
1. Right click your respective partition drive that you want to clear thumbnail cache from and then open its properties.
2. From the properties menu, click on the cleanup tab and tick the thumbnail option.
3. You can also select other items to clean up but be careful in selecting them.
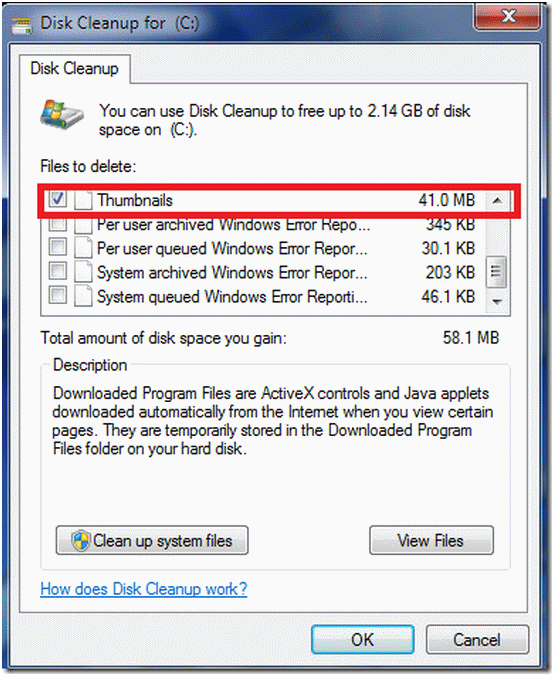
4. Press OK button and your thumbnail cache will be cleared from that hard disk partition.
So, now you have successfully cleared all the caches from your system and this will lead into speeding up of some tasks. You may clean up your system caches whenever you feel like but it is not recommended that you do it very frequently as the caches help in accessing your programs and files really faster from the main memory. So clean them up only when you are in dire need or your system has really slowed down.
